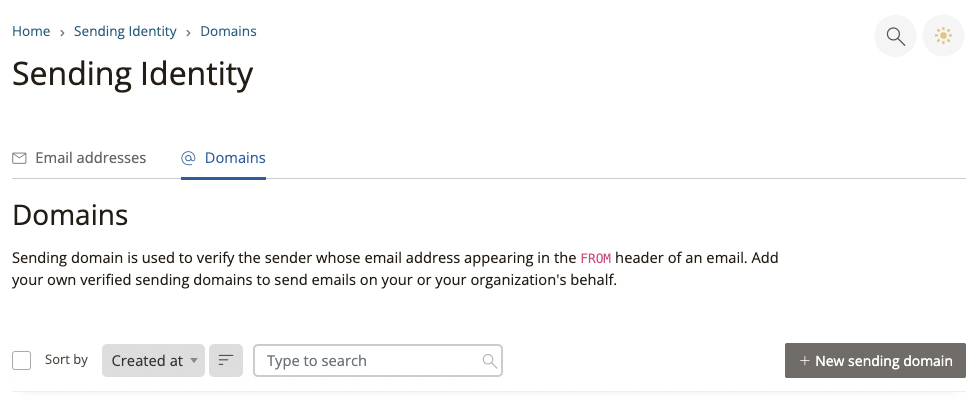
To verify your sending domain choose the “Sending” option from the main menu and then select “Sending domains”.

On the Sending Identity page, Make sure you’re on the “Domains” tab and click the “New sending domain” button to add your domain.
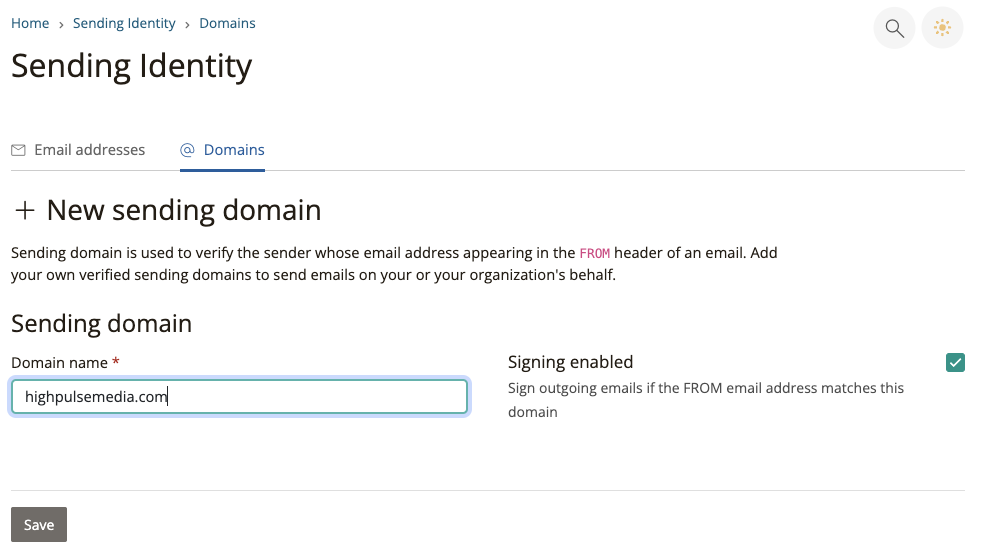
On the “New sending domain” page enter the domain of your email identity.
For example, if you wish to send emails from [email protected] then enter somedomain.com as the domain name then make sure to check the “signing enabled” option to sign all outgoing email with a FROM email address machine the domain.
Once you save the new sending domain you’ll need to verify the domain is truly yours, Setup the required DNS records on your domain registrar website and then click the “Verify Now” button.
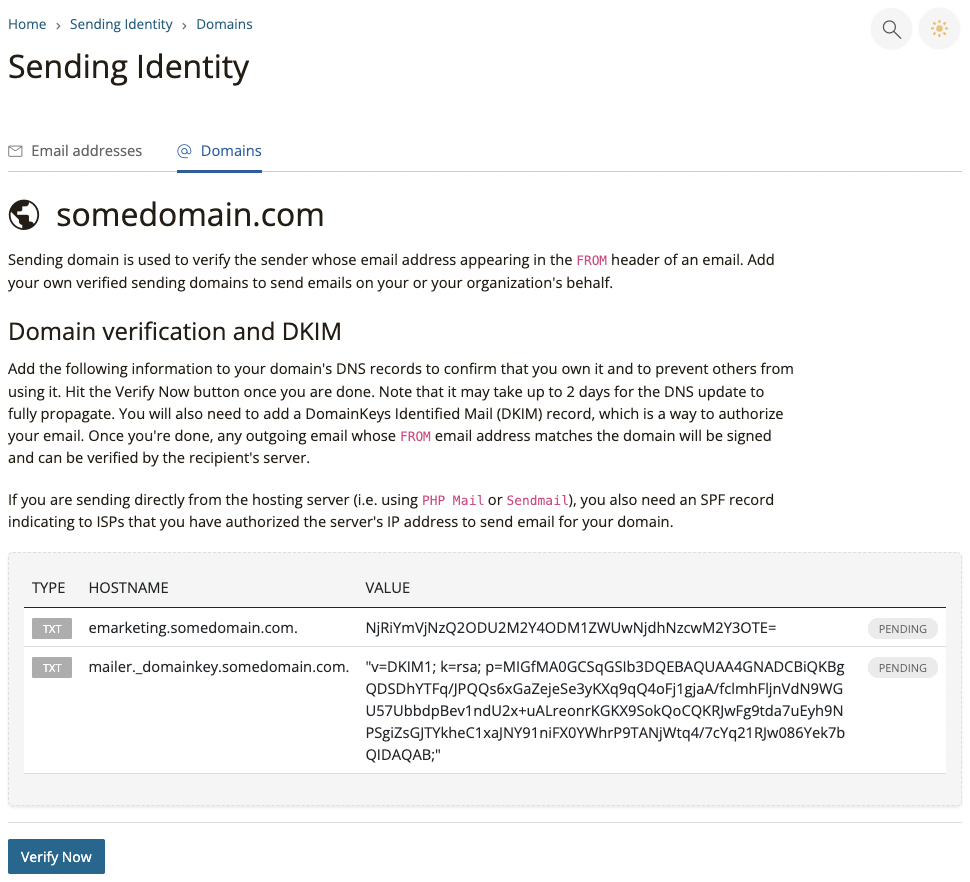
Note that it may take up to 2 days for any DNS updates to fully propagate throughout DNS servers worldwide.