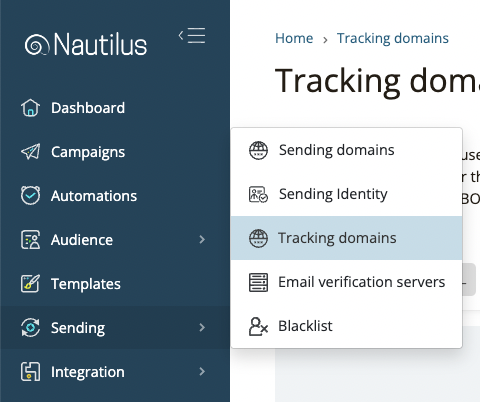
To verify your tracking domain choose the “Sending” option from the main menu and then select “Tracking domains”.
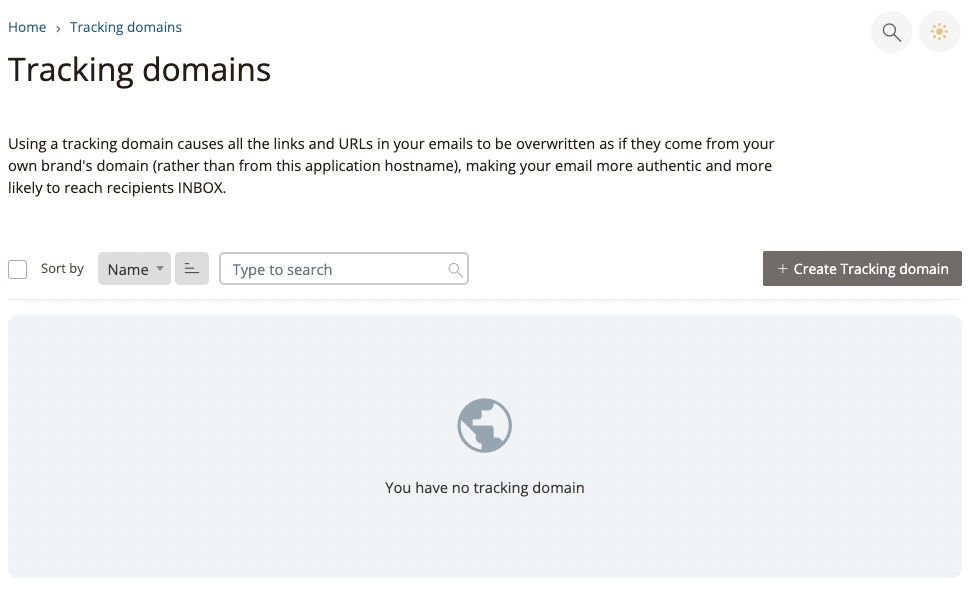
On the Tracking domains page, click the “Create Tracking Domain” button to add your tracking domain.
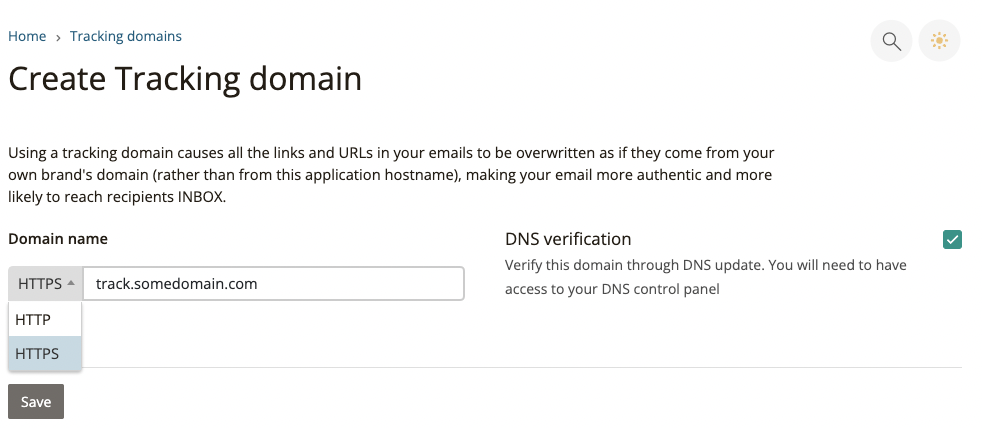
On the “Create tracking domain” page enter the tracking domain you’d like to use, set the HTTP / HTTPS protocol and make sure to enable the DNS verification.
It’s best to use an SSL secured (HTTPS) subdomain under your brand’s domain. This way all your email links will be rewritten to this tracking domain and appear as if they come from your brand’s domain (rather than a weird long unrelated URL).
Tracking domains will also help keep high trust among your email readers and encourage them to click and your emails as they appear safer and are more likely to reach the recipients INBOX.
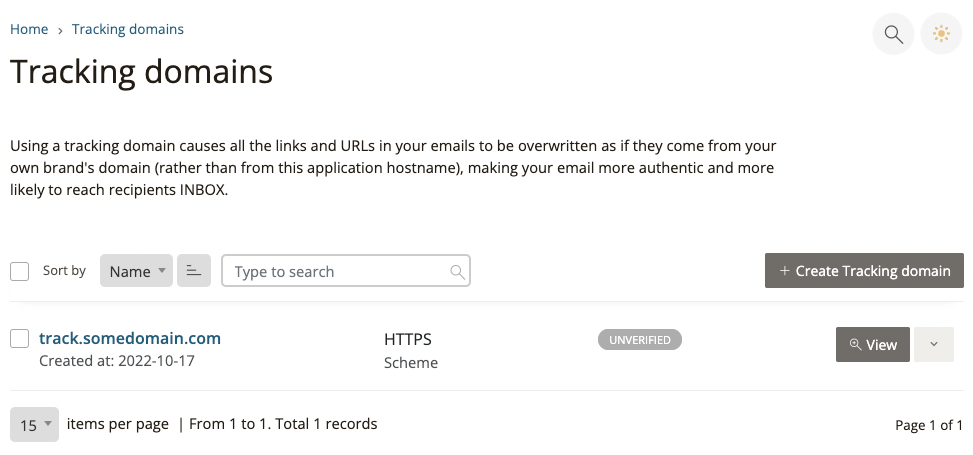
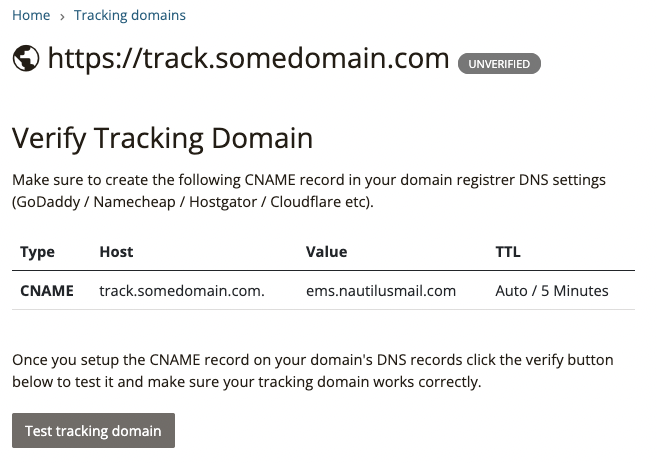
Once you hit the save button your tracking domain will be added but will still appear as unverified. Click the tracking domain name or the “View” button to check the tracking domain status.
On the “Verify Tracking Domain” page, Copy the required CNAME DNS record and add it on your domain registerer DNS records. Once the CNAME record has been added click the “Test Tracking Domain” button to verify your tracking domain is active.
Please note that DNS records usually get updated within a few minutes but it can sometimes take up to 48 hours for your changes to propagate to DNS servers worldwide.
If you’re using CloudFlare for your DNS make sure to set “proxy status” to OFF (DNS only mode).
